Best Equipment Setup for Professional-Quality Live Streams
Most viewers decide within the first few seconds whether a stream is worth watching. Pixelated video, echo-heavy audio, or a dark, poorly lit frame sends them clicking away — no matter how good your content is. Building a professional-quality live stream isn't about spending a fortune on gear. It's about understanding which components matter most and how they work together to create an experience viewers want to stay in.
What Makes a Live Stream Look and Sound Professional
A professional live stream is defined by consistency, clarity, and control — clean audio, sharp video, stable encoding, and a polished visual presentation. Any one of these failing drags the whole experience down.
Think of your stream as a chain. The camera captures your image, the microphone captures your voice, lighting shapes how both look on screen, and your encoding pipeline delivers it all to the platform without degrading quality. Weak any single link, and the audience feels it — even if they can't name exactly what's wrong.
What separates a professional setup from a basic one isn't always the price of individual components. It's intentionality: knowing why you're choosing each piece of gear and how it fits into the whole. A $100 microphone in an acoustically treated room will sound better than a $400 mic in a reflective, echo-prone space. Fundamentals beat expensive shortcuts every time.
Camera: Your Most Visible Upgrade
Your camera is the first thing viewers judge, and upgrading from a built-in laptop webcam to a dedicated camera is the single most visible quality jump you can make. The right choice depends on your stream type, budget, and how much you want to invest in your setup long-term.
Webcams are the entry point. Modern high-quality webcams shoot at 1080p or higher, require zero configuration, and plug directly into USB. For someone just starting out or streaming in a well-lit room, a good webcam is a completely legitimate choice.
The real leap comes when you move to a mirrorless or DSLR camera paired with a capture card. These cameras produce a shallower depth of field, better low-light performance, and a cinematic image quality that webcams simply can't replicate. The trade-off: they're more expensive, require more setup, and need a capture card to feed video into your streaming PC.
A middle ground worth considering — especially for mobile or IRL streaming — is using a smartphone as a camera. Modern flagship phones shoot excellent video, and dedicated apps can turn them into wireless webcams. It's not a permanent solution for a studio setup, but it's more capable than people give it credit for.
Audio Gear: Why Sound Quality Matters More Than You Think
Viewers will tolerate imperfect video far longer than bad audio. Muffled, distorted, or echo-heavy sound is the fastest way to lose an audience, and it's the area where most new streamers underinvest.
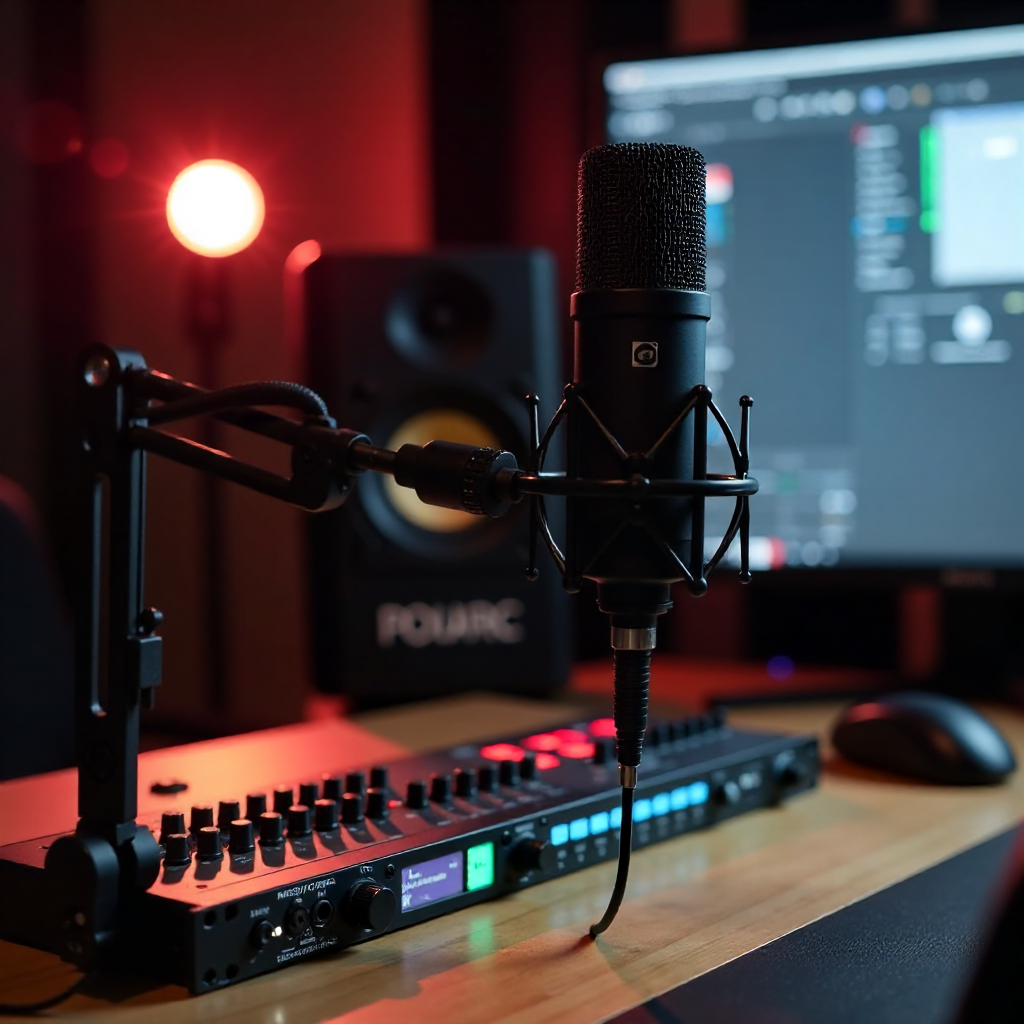
The first decision is XLR vs. USB microphone. USB mics are plug-and-play, affordable, and surprisingly capable — a solid choice for streamers who want good audio without a complicated signal chain. XLR microphones require an audio interface to connect to your computer, but they offer superior sound quality, more control over your signal, and the flexibility to upgrade components independently over time.
An audio interface is essentially a converter that takes the analog signal from your XLR mic and turns it into a clean digital signal your computer can use. It also gives you hardware control over gain levels, which matters a lot when you're live and can't afford to clip or distort mid-stream.
Beyond the mic itself, your recording environment shapes the sound. Hard walls, bare floors, and open rooms create reverb that no microphone can fix. Acoustic panels, heavy curtains, or even bookshelves filled with books break up sound reflections and make a $80 mic sound noticeably better. Don't underestimate this.
Lighting Setup for a Polished On-Camera Look
Good lighting transforms how you look on camera more dramatically than almost any other single upgrade. The goal is to control light — not just add more of it.
Professional lighting starts with a three-point setup: a key light, a fill light, and a backlight (or background light). The key light is your primary source, positioned slightly to one side of your face. The fill light goes on the opposite side at lower intensity to soften shadows. Together, they eliminate the flat, washed-out look that comes from a single overhead light source.
Ring lights are popular because they're affordable and easy to set up, but they produce a distinctive circular reflection in the eyes and tend to create a flat, even light that looks less cinematic than a proper key-fill setup. For casual streaming, a ring light works fine. For a more polished, broadcast-quality look, two panel LED lights give you more control.
Background lighting is often overlooked. A simple LED strip or a small light aimed at your background adds depth and separates you from the wall behind you. If you're using a green screen for virtual backgrounds, even, shadow-free lighting on the screen itself is critical — any wrinkle or shadow creates artifacts that chroma-key software can't cleanly remove.
Encoding, Capture Cards, and Streaming Software
Encoding is how your raw video and audio get compressed and sent to a streaming platform — and getting it right is what keeps your stream from buffering, dropping frames, or looking blurry in motion.
You have two encoding options: hardware encoding (using a dedicated chip in your GPU or an external device) and software encoding (using your CPU via applications like OBS Studio or Streamlabs). Hardware encoding is faster and puts less strain on your system, making it the better choice for gaming streams or any setup where your PC is doing heavy lifting. Software encoding, particularly with x264, can produce slightly better image quality at equivalent bitrates but demands more processing power.
OBS Studio is the industry standard for good reason — it's free, open-source, and handles everything from scene management to audio mixing to stream output. Streamlabs builds on OBS with a more beginner-friendly interface and integrated widgets. Either works well; the choice comes down to whether you prefer raw control or a guided experience.
A capture card sits between an external camera or gaming console and your streaming PC, converting the HDMI signal into something your software can process. If you're streaming directly from a PC with a webcam, you don't need one. But if you're using a mirrorless camera, a dedicated gaming console, or any external video source, a capture card is non-negotiable.
For bitrate and resolution settings, 1080p at 60fps typically requires a bitrate between 4,500 and 6,000 kbps for a clean, artifact-free image on most major platforms. Your upload speed needs to comfortably exceed your target bitrate — streaming at 6,000 kbps on a connection that maxes out at 7,000 kbps leaves no headroom and risks dropped frames.
Stream Control: Scenes, Overlays, and Workflow Tools
Managing a live broadcast efficiently means having instant control over your scenes, alerts, and transitions without fumbling through menus while your audience watches. This is where workflow tools become genuinely valuable.
A stream deck — a physical controller with programmable buttons — lets you switch scenes, trigger sound effects, mute your mic, or launch overlays with a single press. It sounds like a luxury, but once you've run a stream with one, going back feels like editing video with a trackpad. The mental load reduction is real.
Scene management in your streaming software lets you build out different views: a full-screen camera shot, a camera-plus-gameplay layout, a "Be Right Back" screen, and a starting-soon overlay. Switching between these cleanly is what makes a stream feel produced rather than improvised.
Overlays — the graphics, alerts, and on-screen elements viewers see during your stream — add personality and brand identity. Keep them purposeful. A cluttered screen with alerts firing every 30 seconds and a dozen widgets competing for attention looks amateur, not professional. Less, done well, is always the better call.
Putting It All Together: Starter, Mid-Range, and Pro Setups
You don't need to buy everything at once. Build in tiers, prioritize audio first, and upgrade each component as your stream grows.
Starter Setup
- 1080p USB webcam
- USB condenser microphone
- Single ring light or LED panel
- OBS Studio (free) for encoding and scene management
- Software encoding via your existing GPU
This gets you on air with noticeably better quality than a built-in webcam and laptop mic. Total investment is modest, and every component is upgradeable independently.
Mid-Range Setup
- Entry-level mirrorless camera with HDMI output + capture card
- XLR microphone with a dedicated audio interface
- Two-point LED lighting (key + fill)
- OBS Studio or Streamlabs with custom overlays
- Hardware encoding via GPU for stable performance
At this tier, your stream starts looking genuinely broadcast-quality. The XLR mic and audio interface combination alone will put your audio ahead of 90% of streamers at a similar level.
Pro Setup
- Full-frame or APS-C mirrorless camera, high-quality lens, capture card
- Large-diaphragm XLR condenser mic, professional audio interface, acoustic treatment
- Three-point lighting with diffusion panels, optional green screen
- Stream deck for live scene and workflow control
- Dedicated encoding hardware or a high-end GPU with hardware encoder
This setup is what you see from full-time creators and broadcast professionals. The difference between mid-range and pro is mostly refinement — better light control, more acoustic treatment, and faster workflow. The fundamentals are the same.
Frequently Asked Questions
What is the minimum equipment needed to start streaming professionally?
A 1080p webcam, a dedicated USB microphone, and basic lighting — even a single LED panel — will put you ahead of most casual streamers. Add free software like OBS Studio and you have a functional, professional-looking setup without significant investment.
Do I need a capture card if I stream directly from a PC?
No. A capture card is only necessary when you're bringing in video from an external source — like a mirrorless camera via HDMI or a gaming console. If your webcam plugs into USB and your game runs on the same PC you're streaming from, a capture card adds no value.
What bitrate should I use for 1080p streaming?
For 1080p at 60fps, aim for 4,500 to 6,000 kbps. At 30fps, 3,500 to 4,500 kbps is typically sufficient. Always ensure your upload speed is at least 20-30% higher than your target bitrate to avoid instability during peak network usage.
Is a dedicated microphone really necessary over a headset?
For casual streaming, a good gaming headset mic is acceptable. For a professional presentation, a dedicated microphone — even a budget USB condenser — produces noticeably cleaner, fuller audio. Headset mics are positioned inconsistently and pick up more handling noise. The upgrade is worth it early.
Can I use a smartphone as a streaming camera?
Yes, and it's more capable than most people expect. Modern flagship smartphones shoot excellent 1080p and 4K video with strong low-light performance. Apps like Camo or DroidCam let you use your phone as a wireless webcam. It's a legitimate option for getting started before investing in a dedicated camera.